How to Clean an Oil Dispenser Bottle: 10 Easy Methods That Work
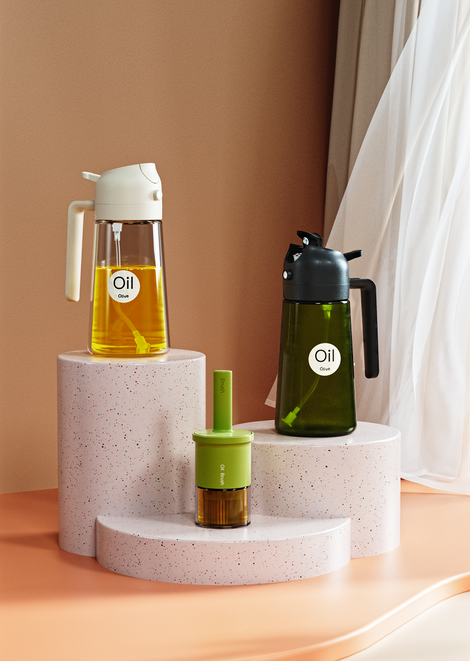
Your oil dispenser bottle probably isn’t as clean as you think. Whether it’s your go-to oil sprayer for air fryer or a fancy glass bottle for olive oil, grime builds up fast. And if you’re not cleaning it properly, you're risking both flavor and hygiene.
The good news? Cleaning your cooking oil dispenser doesn’t have to be a chore. Here are 10 super effective methods to clean oil bottles for cooking—no matter the shape, size, or material.

1. Hot Soapy Water Soak
Best for: Daily maintenance of standard oil bottles
Sometimes, simple works best. Fill the bottle with hot water and a few drops of dish soap. Let it soak for about 10-15 minutes, then give it a good shake. Rinse thoroughly and air-dry upside down. This is the easiest way to keep your cooking oil dispenser in good shape day-to-day.
2. Vinegar and Baking Soda Bomb
Best for: Cutting through sticky buildup
Add 1 tbsp of baking soda into the empty bottle, then pour in a cup of white vinegar. Watch it fizz! This combo breaks down oily residue like magic. Rinse well afterward to remove the acidic smell—especially important for oil bottles for cooking that hold strong-smelling oils.
3. Use a Bottle Brush (Don’t Skip the Neck!)
Best for: Deep-cleaning long-neck bottles
A bottle brush is a must if you’re serious about getting into the nooks and crannies—especially the neck and base of the bottle. Many cooking oil dispensers have narrow spouts that trap oil residue. Scrub gently but thoroughly.
4. Shake with Rice and Soap
Best for: Getting into odd corners of uniquely shaped bottles
Can’t reach the corners? Toss a tablespoon of uncooked rice into the bottle with some warm soapy water. Close the cap and shake like crazy. The rice acts like a gentle abrasive and helps dislodge stubborn residue inside your oil bottles for cooking.
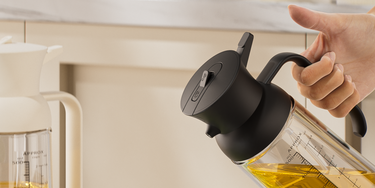
5. Soak the Spout Separately
Best for: Preventing clogs in pourers and sprayers
If your bottle has a pour spout or spray mechanism, don’t just clean the main container. Remove the nozzle and soak it in hot vinegar or soapy water. Use a toothpick or soft brush to clean the tiny holes—especially on an oil sprayer for air fryer, where clogs can ruin the mist.
6. Lemon Juice Deodorizing Rinse
Best for: Getting rid of stubborn oil smells
Tired of that lingering greasy odor? Squeeze fresh lemon juice into the bottle, shake, and let sit for 15 minutes. Lemon’s natural acidity helps break down oil and leaves behind a fresh scent—ideal for multi-use cooking oil dispensers.
7. Boiling Water Flush (for Heat-Safe Bottles Only)
Best for: Disinfecting glass or metal oil bottles
If your bottle is heat-safe (check the label!), pour boiling water inside and let it sit for 10 minutes. This helps sterilize the interior and loosen grime. Avoid this method for plastic oil bottles for cooking, which can warp.
8. Dishwasher Method (Top Rack Only!)
Best for: Lazy but effective cleaning for dishwasher-safe bottles
If your oil dispenser bottle is dishwasher-safe, pop it on the top rack with the spout removed. Use a regular cycle. Just be sure it’s fully dry before refilling—any moisture left behind can lead to mold or rancid oil.
9. Use Rubbing Alcohol for Sanitizing
Best for: Occasional deep disinfection
Pour a small amount of isopropyl alcohol into the bottle, shake thoroughly, and rinse well with warm water. This is perfect for monthly deep cleans, especially if you use your oil sprayer for air fryer often and want to keep bacteria at bay.
10. Dry Completely Before Refilling
Best for: Preventing cloudy oil or mold growth
Even after a perfect clean, moisture is your enemy. Let your bottle air dry completely upside down—use a drying rack or a clean towel underneath. This final step is essential for keeping your cooking oil dispenser fresh and your oil clear.
Final Tip: Clean Monthly, Refill Weekly
Oil can go rancid quickly—especially in warm kitchens. Clean your oil bottle at least once a month, and only refill what you’ll use within 1–2 weeks. This not only protects the flavor of your food but also keeps your oil bottles for cooking in top condition.