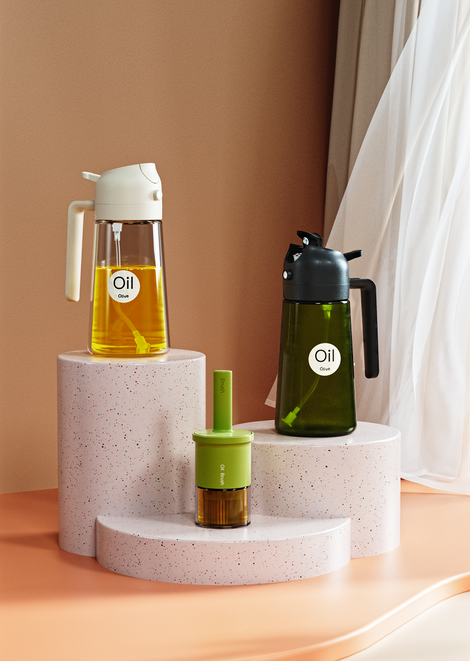
10 Must-Know Strategies for Solving Clogged Oil Sprayer Nozzles (Home Cooking)
Ugh, the dreaded clogged oil sprayer nozzle. One minute you’re lightly misting your salad or greasing a pan, the next… nothing. Just a sad sputter or a frustrating drip. We’ve all been there, ready to toss the whole thing into the recycling bin. But hold up! Before you declare your trusty sprayer dead, try these battle-tested, home cook-approved strategies to bring it back to life and keep it spraying smoothly. Say goodbye to the clogs and hello to effortless oiling!

1. The Hot Water Bath Rescue
This is your absolute first line of defense and often the simplest fix. Fill a heatproof mug or small bowl with very hot tap water (just off the boil is ideal, but be careful!). Remove the sprayer head assembly from the bottle and submerge only the nozzle part in the hot water. Let it soak for 5-10 minutes. The heat works wonders, gently melting away any congealed oils (especially olive oil or coconut oil) that are causing the blockage. After soaking, rinse thoroughly under warm running water and give it a few test pumps. You’d be amazed how often this basic spa treatment does the trick for a clogged oil sprayer nozzle! Works great on a modern oil dispenser with a finer mist mechanism too.
2. Vinegar Power Soak for Stubborn Gunk
Sometimes plain hot water isn’t enough, especially if you’ve got older, sticky residue or stubborn oil varnish building up. Time to bring in the big gun: white vinegar! Fill your soaking container with equal parts hot water and white vinegar. Submerge the nozzle and let it soak for 15-30 minutes, or even overnight for really tough cases. Vinegar’s mild acidity helps break down greasy buildup and mineral deposits from your water that hot water alone can’t touch. After the soak, rinse extremely well under warm running water – you don’t want any vinegar taste lingering on your next salad! This method is fantastic for reviving older sprayers or large oil dispenser nozzles that see heavy use.
3. The Pin or Needle Precision Poke
Okay, the soak loosened things up, but there’s still a tiny speck blocking that crucial hole? This is where a fine pin or sewing needle becomes your best friend. Carefully insert the tip of the pin straight into the nozzle opening. Use gentle probing motions, not force. You’re aiming to dislodge any tiny, stubborn particle that’s wedged itself in there. Combine this with rinsing under running water – poke a little, rinse, poke again. Avoid using toothpicks or anything thicker that could damage the delicate spray mechanism. This micro-surgery is often the final step needed to clear a no drip oil dispenser nozzle after a soak.
4. Dish Soap Suds Scrub (Inside & Out!)
Prevention is key! Regularly giving the entire sprayer mechanism a good clean prevents gunk from building up in the first place. Disassemble everything you can – usually the nozzle cap, the pump tube, and sometimes a little filter basket inside the bottle. Wash all parts thoroughly in warm, soapy water. Use a soft bottle brush or an old toothbrush (dedicated to cleaning, not teeth!) to gently scrub inside the tube and around the nozzle holes. Pay special attention to any nooks where oil loves to hide. Rinse incredibly well until no soapy residue remains. Let all parts air dry completely before reassembling. Doing this every few refills makes a massive difference, especially for a leak proof oil dispenser relying on tight seals.
5. Baking Soda Paste Power (For Heavy Buildup)
Encountered a sprayer head that looks like it has a science experiment growing inside? For heavy, baked-on residue that soaking hasn't touched, make a paste. Mix a teaspoon of baking soda with just enough water to form a thick sludge. Apply this paste directly onto the clogged nozzle openings and let it sit for 15-30 minutes. The baking soda acts as a gentle abrasive. After it sits, use an old toothbrush dampened with warm water to gently scrub the paste into the openings, dislodging the gunk. Rinse extremely thoroughly. This is your eco-friendly heavy artillery for neglected nozzles before you consider giving up.
6. Blow It Out! (The Safe Way)
Sometimes, dislodging debris just needs a little focused air pressure. After a soak or poke, try this: Hold the cleaned nozzle firmly. Put your lips close to the bottom end of the sprayer tube (where it connects to the bottle) and give a few sharp, forceful blows outward through the nozzle holes. Do NOT suck in! The goal is to push any loosened particles or water out the front. You can also try blowing gently through the nozzle holes themselves. Combine this with rinsing. It’s surprisingly effective for clearing those last bits of water or tiny debris after other cleaning steps. Think of it as CPR for your sprayer!
7. Filtered Oil is Your Friend
This is pure prevention magic! Many sprayer clogs start with particles in the oil itself – bits of herbs, spices, or sediment, especially in infused oils or unfiltered extra virgin olive oil. Before pouring oil into your sprayer bottle, filter it. Use a fine-mesh strainer or even a coffee filter placed over a funnel. This simple step catches the gunk that would inevitably travel up the tube and jam the nozzle. It’s the single best habit for keeping your modern oil dispenser spraying freely long-term. Clear oil in = clear spray out!
8. Ditch the Heavy Oils (Sometimes)
Let's be honest, some oils are just more prone to clogging, especially at cooler room temperatures. Extra virgin olive oil and coconut oil are the usual suspects. While they work in the sprayer, they solidify more easily in the tiny nozzle holes. If you constantly battle clogs with these, consider dedicating one sprayer only for lighter oils like regular olive oil, canola, or avocado oil. Reserve your beautiful, flavorful EVOO for drizzling directly or use it in a sprayer you commit to cleaning immediately after every use and storing somewhere slightly warmer. Know your oils' quirks!
9. The Boiling Water Blitz (Use With Caution!)
Reserved for extremely stubborn, heat-resistant plastic nozzles that have survived previous methods! Check your sprayer parts first! If they are definitely sturdy plastic (not flimsy), bring a small pot of water to a boil. Remove from heat. Using tongs, carefully submerge only the clogged nozzle assembly into the hot water for *30-60 seconds MAX*. The intense heat can melt away even the most persistent varnish. Do not leave unattended! Immediately remove, rinse under cold water to cool, then test. Warning: This can warp or melt cheaper plastics. Proceed with caution and only if other methods fail. Not recommended for all no drip oil dispenser types.
10. Smart Use & Care: Your Daily Defense (Plus Dispenser Tips!)
Conquering clogs is great, but preventing them is the real win. Here’s your daily playbook:
-
Pump Power: Use firm, full pumps. Half-hearted pushes don’t build enough pressure for a clean spray, leading to drips and residue buildup.
-
Post-Use Purging: After spraying, give 2-3 empty pumps into the sink or a rag. This clears oil from the tube and nozzle, preventing it from sitting and congealing inside. This is HUGE!
-
Store Upright: Always store your sprayer standing straight up. Storing on its side lets oil pool in the nozzle, inviting clogs.
-
Wipe Down: Quickly wipe the nozzle tip with a clean cloth after purging to remove any lingering oil film.
-
Dispenser Choice Matters: Consider your needs!
-
A large oil dispenser is great for high-volume kitchens but needs regular cleaning due to more oil exposure.
-
Prioritize a truly leak proof oil dispenser design to avoid messy cabinets and wasted oil.
-
A modern oil dispenser often has better sealing and finer mist mechanisms – keep them clean!
-
The dream? A genuinely no drip oil dispenser combined with these cleaning habits equals oil-spraying bliss.
-
Keep the Flow Going!
Clogged oil sprayer nozzles are annoying, but they’re rarely a death sentence. Armed with these 10 strategies – from simple soaks and pokes to smart filtering and daily purging habits – you have the power to rescue your sprayer and keep it misting perfectly. Remember, consistency is key! A quick clean after use and using filtered oil makes a world of difference. Invest a little care into your sprayer, whether it's a simple bottle-top or a fancy modern oil dispenser, and it will reward you with effortless, mess-free cooking grease application for years to come. Now go forth and spray with confidence! What's your go-to unclogging trick? Share in the comments below!